How-to connect to the internal server
This is a short guide to add students to the local machine. It has a first part that is meant to be followed by students. Then, the second part is a remainder for who creates the account.
User Access
To access to our computation machine, you need either to connect using an ethernet cable or to access through the polimi VPN. A VPN (Virtual Private Network) is a technology that creates a secure, encrypted connection between your device and an internal network.
Estabilish the VPN connection [optional]
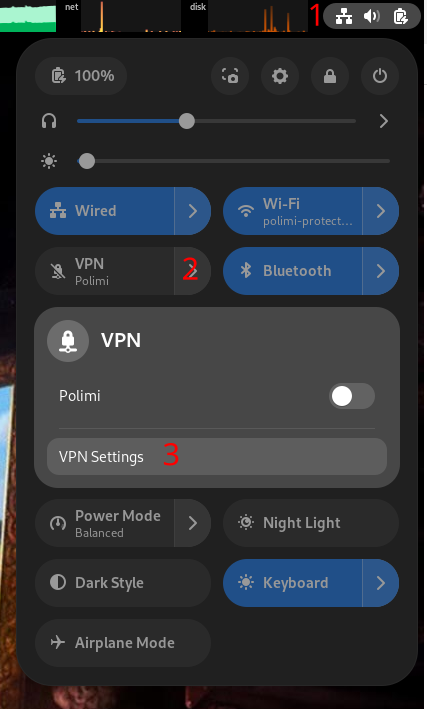
After being enabled to use the VPN service, you need to follow these steps:
- Open the VPN settings from, e.g. on GNOME desktop environment follow these steps:
- Add a vpn “Multi-protocol VPN client”. NOTE: if you don’t have that option you need to install the following packages:
network-manager-openconnect network-manager-openconnect-gnome - In the identity tab add only the following options:
- set
VPN ProtocoltoPalo Alto Networks GlobalProtect - set
Gatewaytohttps://gp-deib-saml.vpn.polimi.it/gateway:prelogin-cookie
- set
- Follow direction to connet and login using the 2-Factor-Authentications
Configure an ssh configuration file
Create the ~/.ssh/config file if not existent.
Append the following lines:
Host <name>
        HostName <ip_address>
        User <username>
        PreferredAuthentications publickey,password
        ForwardAgent yes
Please, replace the following tokens with the required machine information:
<name>: the name of the server, can be any string<ip_address>: the machine address<username>: your username in the machine
Connect to the target machine
From a terminal use the following command to spawn a shell in the target machine
$ ssh <name>
Manage software
Use spack and module to manage the software.
We have made a dedicated tutorial.
Account creation
Use this command to create a user:
$ sudo adduser <username>
Put a default password for every user. Switch to the new user with the command:
$ su <username>
Add its public key to the file ~/.ssh/authorized_keys.
Create a file named ~/.spack/upstreams.yaml with the following context:
upstreams:
  spack-instance-1:
    install_tree:   /work2/spack/opt/spack/
    modules:
      tcl: /work2/spack/share/spack/module
Clone a user-specific spack:
$ mkdir -p /work2/<username>
$ git clone https://github.com/spack/spack.git /work2/<username>/spack
$ source /opt/dgadioli/spack/share/spack/setup-env.sh
$ spack config add modules:default:enable:[tcl]
Add the following lines to ~/.bashrc:
source /work2/<username>/spack/share/spack/setup-env.sh
spack load environment-modules
source $(spack location -i environment-modules)/init/bash